2006+ Honda Civic Forum banner

[HOW TO] DIY - Footwell lights (they dim!)

134K views 245 replies 74 participants last post by  Trev27  
#1 ·
DIY – footwell lighting (just courtesy lighting)

This DIY explains how to make the necessary connexions in order to install RickHondaR`s Replica Honda footwell lighting kit and make them work together with the courtesy lights on the roof. When you open the car they light up and when you close the car or start the engine they dim until they turn off.

Video:

“Still don’t have it”

1º- You have to get your own RickHondaR`s Replica Honda footwell lighting kit.

http://www.civinfo.com/forum/sale-wa...hting-kit.html

The advantage on Rick’s kit is that it includes the cables already welded and they also include two scotch locks for fast mounting.

2º- Once you got your kit it would be a good idea to get a couple of male – female connectors, I’ve picked this:


We’ll also use some bridles (I believe this word is correct?)

3º- We have to unmount the plastic cover that goes beneath the steering wheel, to loosen it we first have to remove the triangular cover located at the side of the dash, where the driver’s door is. We unscrew the bolt and pull the cover downwards.


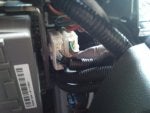
4º- We have to locate the connector with the necessary cables, the molex (plug) is located behind the fuse box, in the image below is the one marked with a red X.


"VISTA FRONTAL"=FRONT VIEW
"VISTA LATERAL"=SIDE VIEW
"PRESIONAR AQUI PARA SOLTAR"=PRESS HERE TO RELEASE

These are light blue and light green cables.
To unplug the connector it’s necessary to press the little plastic that holds the plug. See image.

5º- Once we have located the cables we have to remove the isolating tape and cut part of the tube containing the wiring. Then we have to use the scotch locks to bypass these two cables with our cables with their connectors. (see step 2).

How to use the scotch locks (I didn’t know!!)

6º- Now it’s time to connect the kit and check that it works fine (closing and opening the doors with our key).

7º- We remove the plastic cover located behind the glove box, in the passenger’s side, this is only held by some clips.


8º- Using a long piece of wire (like the ones used on fences) we pass it from the driver’s side to the passenger side behind the central console, more or less where the carpet ends, once it has been passed we attach the passenger’s light strip to one end of the wire and we pull until we get it on the other side.

9º- We have to secure the loose cables with some bridles to avoid rattles (I believe we have enough) and we proceed to stick the led stripes where we like. I did it this way


10º- We put all the panels back to their place and now we can enjoy our masterpiece!!!.

Hope you find it useful!!!
 
#210 · (Edited)
Footwell lighting - dimming - locate and access plug


I bought the Rick Honda LEDs and installed them to the glove box light. However, I would like the lights to switch on only when opening/closing the car with the keys or when opening/closing the doors. So I decided to unmount the dashboard on the driver's side as stated above.

Now I am not sure on (1) where to locate the plug to connect the LEDs and (2) the best way to acces the plug either from the front or from underneath the dashboard. I am posting some photos maybe one of you guys can explain the matter better :)
 
#11 · (Edited)
That's a really good write up, and today I've fitted some blue footwell LEDs. :cool:

One thing to note, is that different cars seem to have different plugs where the light wiring joins up behind the fusebox. On my Type S GT, there were the two plugs like in soponcio_virtuals write up, but there was one behind the other, rather than being side by side. Perhaps a slight difference between left & right hand drive cars ?

I didn't use Rick's kit to provide the illumination, I bought two LED spot lights from Halfords, £5.99 each and whilst they don't give out the same brights as Rick's 9 LED strips, they are bright enough for me.

I will post pictures tonight, once I've seen the lights properly in the dark.

Link to Halfords website
Prism LED Single Spot Light Blue from Halfords Price £5.99

Pictures now added
 
#56 ·
That's a really good write up, and today I've fitted some blue footwell LEDs. :cool:

One thing to note, is that different cars seem to have different plugs where the light wiring joins up behind the fusebox. On my Type S GT, there were the two plugs like in soponcio_virtuals write up, but there was one behind the other, rather than being side by side. Perhaps a slight difference between left & right hand drive cars ?

I didn't use Rick's kit to provide the illumination, I bought two LED spot lights from Halfords, £5.99 each and whilst they don't give out the same brights as Rick's 9 LED strips, they are bright enough for me.

I will post pictures tonight, once I've seen the lights properly in the dark.

Link to Halfords website
Prism LED Single Spot Light Blue from Halfords Price £5.99

Pictures now added
View attachment 14600 View attachment 14601 View attachment 14602
That's something I'm about to do! Just have to find right LEDs in Russia. Is the manual for fitting this type of LEDs the same as in the first post?
 
#13 ·
What would happen if you did the following?

And no, I'm not going to attempt it!

Headlights (Riks) --> Resistor --> Capasitor ----\
************************************ |----LIGHTS
Courtesy light --> Capasitor -------------------/

Therefore you get 12v and full light whilst the courtesy light is on, then when that goes off it's dim whilst the headlights are on.
I believe the capasitors would stop a short circuit, but I don't know enough about this!
 
#16 · (Edited)
DIY – footwell lighting
These are light blue and light green cables.
Which is the positive and which is the negative of these two cables?
---
Edited to say I just tried this and it worked - not sure which way I connected it but it works and can't wait for it to get dark and see it now!! FYI I bought these (6 leds for each footwell) - seem very cheap. Will add photos later.
 
#17 · (Edited)
Here are some photos - really pleased with the LEDs - total cost including wires and scotch locks £10 from maplin. Love the way it fades out with the interior lighting.
 

Attachments

#22 ·
Yeah thats it. Just use the scotch locks to connect to the light green and light blue cables. I presume the original poster used the male/female connectors to make it easier to change the leds perhaps once they had got the wires connected up? I didn't bother - I can always cut the wires if I want to change colours of the LEDs or something.

Actually it's worth mentioning - when I tried to feed the led through the center console initially I tried to feed it through kind of the middle of it (not right up where the carpet stops - which I did after re-reading the post and was much easier!) and the contacts on the leds must have hit some metal in there and it shorted out the circuit. Just needed to replace the fuse under the bonnet.
 
#24 ·
Are we talking bout the left block . Just for clarity is there any change you could edit your pict with a arrow/circle pointing to the correct wires .
cheers
 
#26 ·
Thats a great help ,thanks for doing that . Now one quicky , the wires feel quite tight . Once you released the plug did you find there was some slack to play with .
cheers
 
#29 ·
glad to see I wasn't the only one who had trouble finding how to release the clip! :lol:

yeah it was very tight to get the scotch locks on. god knows how many time i dropped the sodding things :rolleyes:
in hindsight, you can probably cut some length off the end of the scotch locks - the middle bit where the metal wire joining plate thingy is the important part.

thanks for editing the image, benjamino!

Cheers,
Gav
 
#32 ·
Ok , got mine wired up today and they work well . I think i should advice people though that this is not a walk in the park . Things could go pear shape very quickly . Example which happened me . The blue wire broke when using a scotch lock and theres no slack at all in the cable . I had to solder upside down in the car . Im a engineer and was able to recover with soldering and heat shrink . But bear a thought lets say you bend a pin in that block connector or break a wire and have no slack to repair .
Im just throwing caution to the wind .. be careful if you proceed .
Would i do it again ?
Nope wouldnt take a risk , but hey thats my call .

Great piece of work geting the cables identified so well done there to soponcio_virtual and also benjamino and Gavin for the picts .

hope this helps
 
#34 ·
Doesnt anyone remember what wire is positive and negative? Or doesnt it matter? I just wouldnt be too happy with changing wires when they're almost cut in the clip :p
 
#36 ·
I've just done this on my 06 UK Civic 1.8 and my connector block wasn't white it was blue and a bit smaller I think. Anyways, I managed to fudge it together in the end, had a tough time with the scotch locks, but its all working. And then had it wired up the wrong way as I didn't know if blue or green was the postive, still not entirely sure.... :)
 
#37 ·
What is it with peoples memories here?! :p Cant someone with a working setup check what's the correct combination? Just to have that clearified for everyone else who're about to do this.

Pleeeeaaaaase? [smilie=sad.gif]
 
#38 · (Edited)
Guess my memory chips arent what they used to be . No biggy really ..
If you are determinated to go ahead and scotchlock a piece of wire to each then just stick a multimeter on the two wires and hey presto youve worked out postive . Almost 100% that the light blue is the postive but sure check it when you installing and post back for others . One thing for sure is im not going near them two wires again ( scary biscuits ).
A bit of advice : when using the scotchlocks dont just connect them straight to the wires feeding the leds . Drop of the two wires onto spades .
Then have female spades on the wires coming from the lights . That way no need to reopen any scotch locks .
 
#39 ·
If only I had a multimeter! Maybe I can find one at work to steal for a day or two :rolleyes:

No doubt I'd find out about this myself and post whatever I find out here asap, but it's just too cold here at the moment for me to do something like this :p Until I get a chance in a garage or warm weather, I just want as much info on how to do this as possible :)

The spades-thing is a good idea though, I'll make sure to have a set of those around [smilie=gt-happyup.: