

Ambient Lighting Easy Install (dimming)
Here is a guide (how to) install ambient lights in simply way and they dimm when you open door (like lights for reading....)
.....c/p from some german forum....and sorry for bad translation in file....but you'll get the idea just by looking in pictures.....
-------------------------------------------------------------------------------------------------------------------------------
-------------------------------------------------------------------------------------------------------------------------------
Ambient lighting (dimming)
The simplest method is to measure the whole thing over interior lighting. Work time approx.. 1 hour.
Advantage:
· functionality remains preserved (automatic Dimmen etc..)
· simple to install
Material:
· 2 x LED borders (over eBay)
· cables not to load small screws
· drill press
· soldering irons
· 2 x connecting terminals (of Conrad)
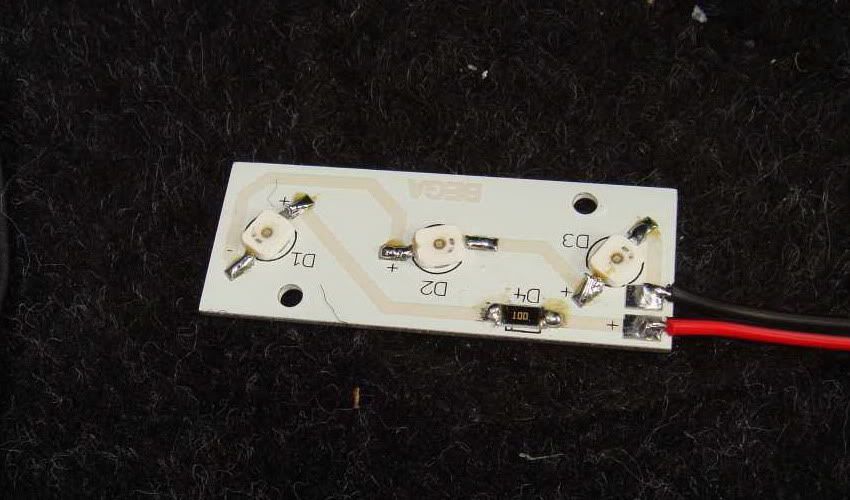
Around the entire electric circuit I decided for such LEDS. There are 3 superflux LED's on board and are shown on supplied metal plate (with eBay approx.. 12€ the piece).

Advantage:
· opposite cold light tubes the electric circuit will load hardly and the power inputs is a joke
· super flat and simple to screw under the instrument panel
· super brightly and above all also daylight-suited!
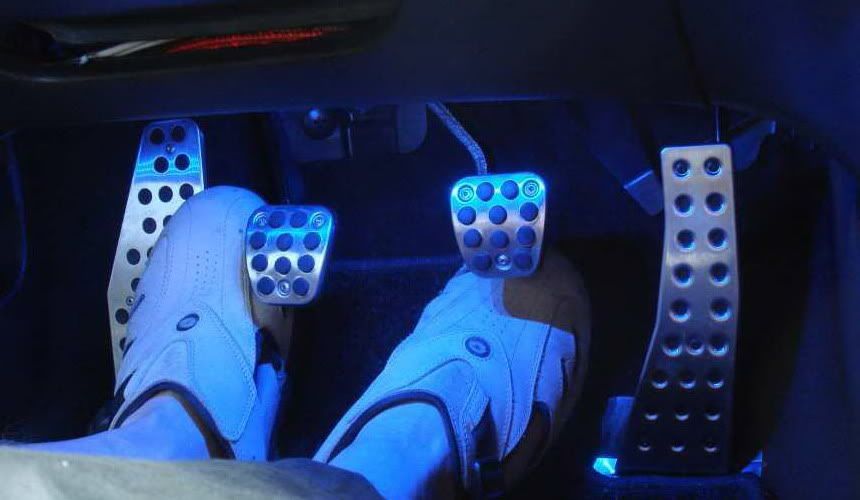
On Daylight
![Image]()
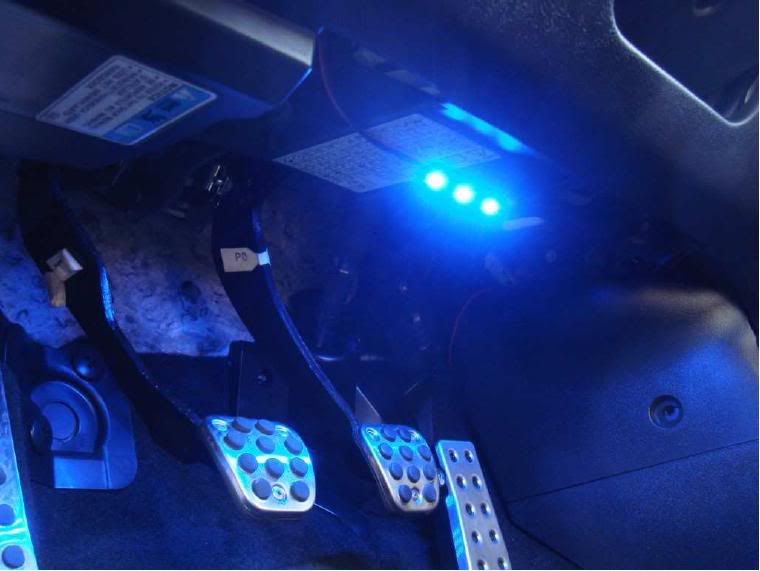
Night
![Image]()
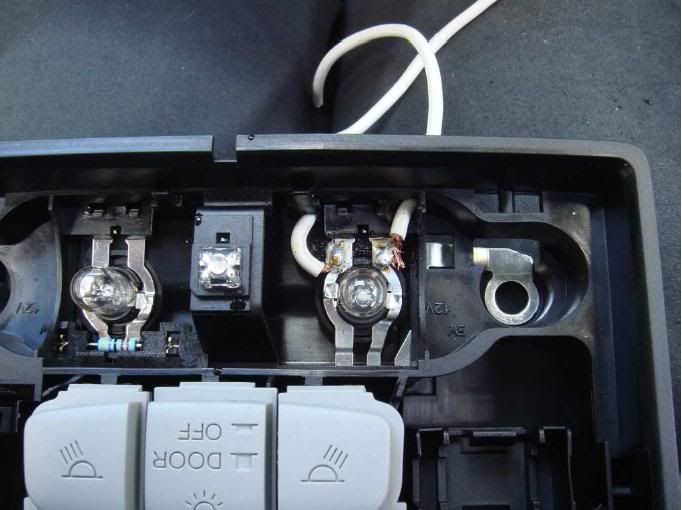
And wires:
· glass of the interior lighting with small screwdriver lever off (with me a fingernail is already already enough). The whole part has only 2 screws and cables to take off. You have to drill two holes on clean-bored for the additional cable. The positive cable is to the center (red arrrow)
![Image]()
![Image]()
Here is a guide (how to) install ambient lights in simply way and they dimm when you open door (like lights for reading....)
.....c/p from some german forum....and sorry for bad translation in file....but you'll get the idea just by looking in pictures.....
-------------------------------------------------------------------------------------------------------------------------------
-------------------------------------------------------------------------------------------------------------------------------
Ambient lighting (dimming)
The simplest method is to measure the whole thing over interior lighting. Work time approx.. 1 hour.
Advantage:
· functionality remains preserved (automatic Dimmen etc..)
· simple to install
Material:
· 2 x LED borders (over eBay)
· cables not to load small screws
· drill press
· soldering irons
· 2 x connecting terminals (of Conrad)
Around the entire electric circuit I decided for such LEDS. There are 3 superflux LED's on board and are shown on supplied metal plate (with eBay approx.. 12€ the piece).
Advantage:
· opposite cold light tubes the electric circuit will load hardly and the power inputs is a joke
· super flat and simple to screw under the instrument panel
· super brightly and above all also daylight-suited!
On Daylight

Night

And wires:
· glass of the interior lighting with small screwdriver lever off (with me a fingernail is already already enough). The whole part has only 2 screws and cables to take off. You have to drill two holes on clean-bored for the additional cable. The positive cable is to the center (red arrrow)


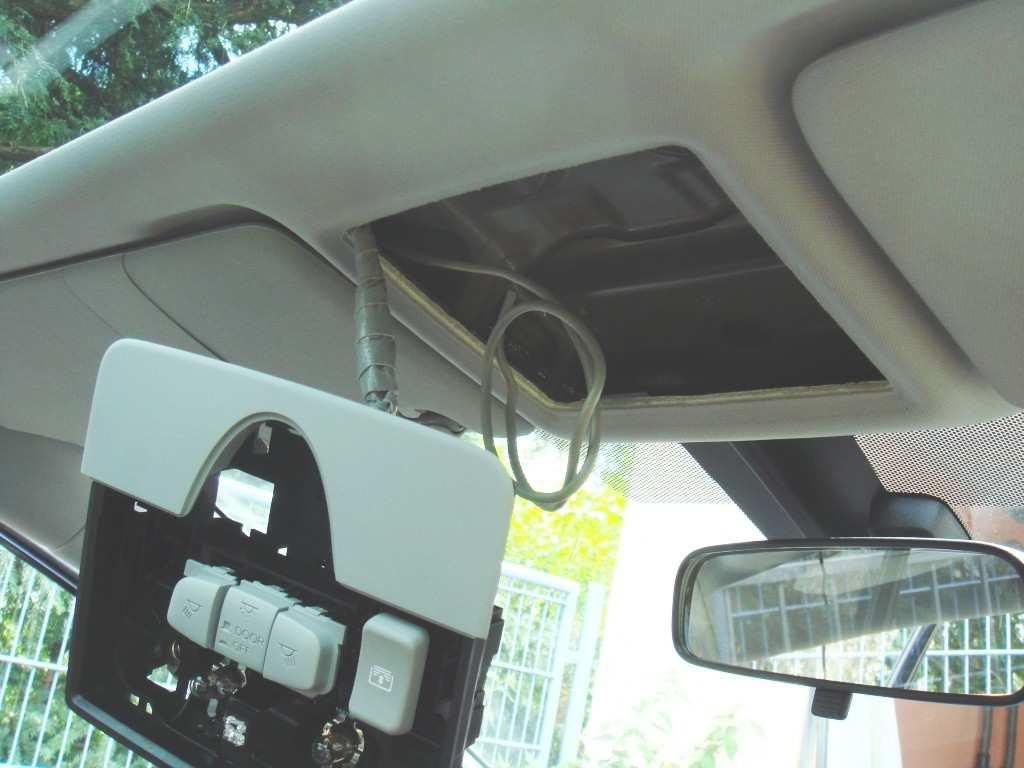
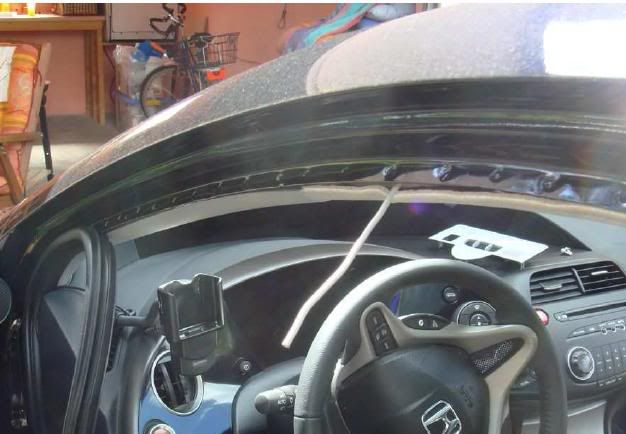
· under the rubber where the firm wire cable is pulled from the door seal of the driver's side (picture below). It can be shifted under the door seal further invisibly up to the instrument panel. The door seal (rubber) can be taken off completely easily and takes no damage thereby
![Image]()
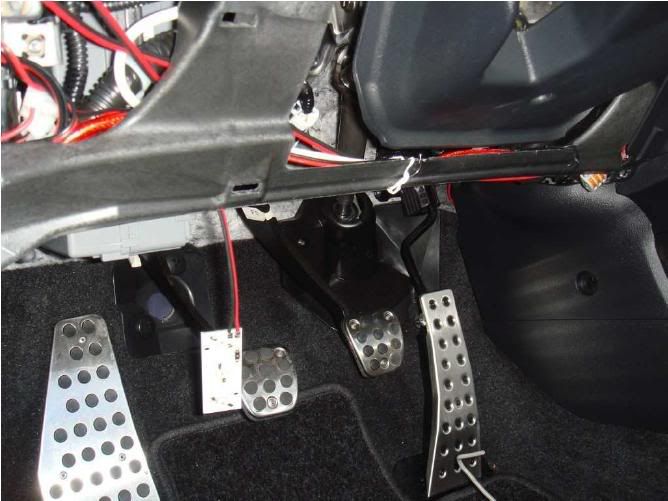
· the side screen of the instrument panel at the driver's side carefully take down with screwdriver. Under instrument panel cover they are fixed with a screw (LED's). Otherwise you could only put them or glue them for simple taking off. Cable is pulled into the instrument panel.
· for the front passenger side has the cable. On the LED soldered with the wire behind the center console to driver's side. The length is sufficient. Both LEDS attached and under the instrument panel bolts.
![Image]()
![Image]()
![Image]()
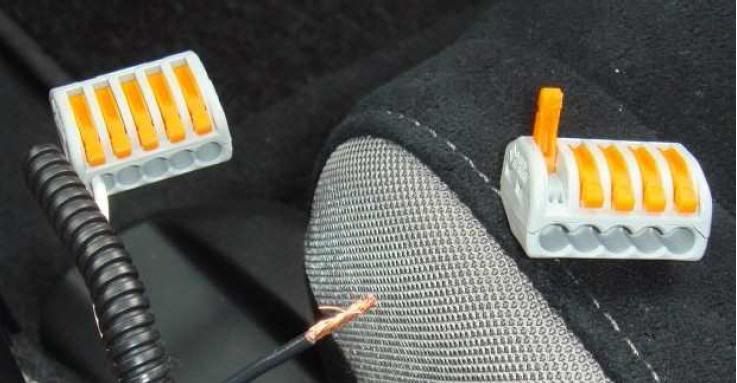
For attaching other side use interwiring clamps, since one doesn't have to solder or screw and later I can still parallel attach it.
![Image]()

· the side screen of the instrument panel at the driver's side carefully take down with screwdriver. Under instrument panel cover they are fixed with a screw (LED's). Otherwise you could only put them or glue them for simple taking off. Cable is pulled into the instrument panel.
· for the front passenger side has the cable. On the LED soldered with the wire behind the center console to driver's side. The length is sufficient. Both LEDS attached and under the instrument panel bolts.


For attaching other side use interwiring clamps, since one doesn't have to solder or screw and later I can still parallel attach it.


")


