

[HOW TO] Install non OEM parking sensors - and save £250!!!!
This is based on the fitting of the CISBO non OEM parking sensors which I purchased from ebay for £27 delivered. They are a good colour match for Galaxy Grey. (The saving is actually £360 compared to the Honda kit, unless you pay a Honda dealer to fit them at approx £150)
I followed the Honda instructions for the OEM sensors here. (Thanks Pottsy)
but found them not exactly the clearest document I've read. Regardless of which sensors I believe the following is applicable:
Tools:
10mm Socket
Extension bar
Ratchet wrench
Centre Punch (or sharp tool)
Drill (preferably cordless!)
Drill bit and circular saw (supplied in the kit)
Sharp Knife
Electrical crimping tool
Parts:
CISBO 4 sensor revering kit
Cable Ties
Spade connectors
Rubber Grommet to take all 4 cables or Silcone bathroom sealant to use around cut original hard plastic grommit.
(See whats in the box: http://www.civinfo.com/forum/attachment.php?attachmentid=364&stc=1&d=1157204817)
Note:
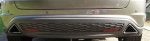
Do not remove all the clips on the lower edge of the bumper. There are 4 each side - leave the middle 2 of each 4 in place (these hold the triangular exhaust trim in place). (See photo http://www.civinfo.com/forum/attachment.php?attachmentid=460&stc=1&d=1158358977)
Do not completely remove the rear wheel arch trim - pull from the rear and only go as far as required to access the retaining screw ( See Photo ) Be careful and try and ease the trim away - pull too hard and you will easily break the trim and never the clip!!!
The bumper needs to be pushed forward and the forward most edge prised out each side (See photo XX). This can be done before releasing the four retaining bolts (hidden behind the body coloured caps) - useful if you are doing this on your own!
There are different sized clips - smaller ones for the wheel arch ( See Photo ) remember this for reassembly!
The inside of the bumper is clearly marked for the 4 drilling points - drill your pilot hole from the back and use the hole saw from the painted side. You will need to undo the chuck each time and pass the saw through the hole - dont try and pull it back out.
Once the four sensors are in place you will need to cable tie the run of cables together and pass through a rubber grommit (not supplied). A cable tie each side of the grommit will prevent the cables being pulled or dropping down behind the bumber. You could also drill a small hole and cable tie the run of cables to a flange on the back face of the bumper - I didnt think this was necessary as the cables are well away from the exhausts but it would prevent too much pull on the sensors connections themselves.
I located my unit under the polystyrene floor filler - bit of cutting required nad the beeper between the middle seat belt mounts. You can get the cables out of the way without removing any trim. (you will need to remove the spare wheel well cover whichever way you do it)
The pain is running the supply up behind the rear pillar to the connector.
Putting it all back took 20 minutes - shame it took an hour to realise how to release the rear bumper!
Credits:
CISBO - AubreyS
Honda PDF - Pottsy
Thanks
This is based on the fitting of the CISBO non OEM parking sensors which I purchased from ebay for £27 delivered. They are a good colour match for Galaxy Grey. (The saving is actually £360 compared to the Honda kit, unless you pay a Honda dealer to fit them at approx £150)
I followed the Honda instructions for the OEM sensors here. (Thanks Pottsy)
but found them not exactly the clearest document I've read. Regardless of which sensors I believe the following is applicable:
Tools:
10mm Socket
Extension bar
Ratchet wrench
Centre Punch (or sharp tool)
Drill (preferably cordless!)
Drill bit and circular saw (supplied in the kit)
Sharp Knife
Electrical crimping tool
Parts:
CISBO 4 sensor revering kit
Cable Ties
Spade connectors
Rubber Grommet to take all 4 cables or Silcone bathroom sealant to use around cut original hard plastic grommit.
(See whats in the box: http://www.civinfo.com/forum/attachment.php?attachmentid=364&stc=1&d=1157204817)
Note:
Do not remove all the clips on the lower edge of the bumper. There are 4 each side - leave the middle 2 of each 4 in place (these hold the triangular exhaust trim in place). (See photo http://www.civinfo.com/forum/attachment.php?attachmentid=460&stc=1&d=1158358977)
Do not completely remove the rear wheel arch trim - pull from the rear and only go as far as required to access the retaining screw ( See Photo ) Be careful and try and ease the trim away - pull too hard and you will easily break the trim and never the clip!!!
The bumper needs to be pushed forward and the forward most edge prised out each side (See photo XX). This can be done before releasing the four retaining bolts (hidden behind the body coloured caps) - useful if you are doing this on your own!
There are different sized clips - smaller ones for the wheel arch ( See Photo ) remember this for reassembly!
The inside of the bumper is clearly marked for the 4 drilling points - drill your pilot hole from the back and use the hole saw from the painted side. You will need to undo the chuck each time and pass the saw through the hole - dont try and pull it back out.
Once the four sensors are in place you will need to cable tie the run of cables together and pass through a rubber grommit (not supplied). A cable tie each side of the grommit will prevent the cables being pulled or dropping down behind the bumber. You could also drill a small hole and cable tie the run of cables to a flange on the back face of the bumper - I didnt think this was necessary as the cables are well away from the exhausts but it would prevent too much pull on the sensors connections themselves.
I located my unit under the polystyrene floor filler - bit of cutting required nad the beeper between the middle seat belt mounts. You can get the cables out of the way without removing any trim. (you will need to remove the spare wheel well cover whichever way you do it)
The pain is running the supply up behind the rear pillar to the connector.
Putting it all back took 20 minutes - shame it took an hour to realise how to release the rear bumper!
Credits:
CISBO - AubreyS
Honda PDF - Pottsy
Thanks


 ) I live in Kettering!
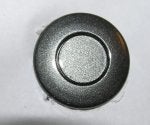


