2006+ Honda Civic Forum banner

Michaels white 4 door 1,5t

21K views 74 replies 12 participants last post by  Mike42dk  
#1 ·
Hi


So i'm starting a new gallery tread, as I have sold my old Honda Civic, and got my self a new Honda Civic.
My old gallery tread https://www.civinfo.com/forum/gallery-8g/111006-michaels-fk2.html


I have already some plans for my new car, something I can start doing now, and others I have to wait to do to the guarantee runs out :)


on the to-do list, as I'm thinking right now, in no special order, just my thoughts.


Dash cam, front and rear

New Wheels 18"
Colour coding trim, rear and grill
De-badging
Gear knob
Carbon in the cabin
K-tuner
Trunk mats
Mudflaps
Spoiler
and some more stuff I haven't figured out yet :)


Image
 
#2 ·
Getting the new 18" wheels on, sure helped on the look, and so much on driving the car.
I think the 17" 205/50 wheels, are to small for a car with the power from the 1.5t engine, and that a set of 18" 225/40 wheels suits the car so much more, and actually the Goodyear tires are more silent that the tires the car came with.


Image
 
#9 ·
Got my Dashcam fitted :) ...
Check video below :-( so now I'm on the seach for a Blackvue dashcam./QUOTE]Tilt it down so you don't have as much sky in the picture. The bright sky makes the bottom bit that you are interested in underexposed.
Note how the road exposure 'brightens up' as you have a sky full of trees as you drive into the car park.
Much better to have more dash showing and a better exposed area of interest.
Unless of course you are looking for UFOs or are an avid plane spotter.>:)
 
#10 ·
When I got my car I ordered it with an OEM Honda detachable tow bar, which is fine, but they deliver the tow bar in a blue cotton bag, and I don't like the idea of having the tow bar flying around, in my trunk, when i drive.

So I took the foam out, the one under the boot carpet, and found that if I cut out a small piece, I could fit the tow bar just fine, now I just wonder why Honda did not do this from design start? :)


After that I put in my new boot liner, can't do without it :)


Image

Image
 
#13 ·
So I finally got around to get the car painted, just need to clean it, and then I will wait for some fine weather, then I will take a bunch of pictures, to show how nice it looks.

And it's not just the scratch that is painted, I have painted the grille, and other parts of the car.


Image
 
#16 ·
I wanted to change the rear Honda logo, so I had to take the rear trunk shield of.

Quite easy when you know what to do, I think it's a 10 min job, but I spent some more time the first time.

This also useful if you need to change the rear camera or change the led number plate light.

I used a plastic pry tool, with a 45 degree angel, a 8 socket wrench, small flat screwdriver, side cutter.

Start with removing the small clips that holds the plastic cover, the clips are located in the bottom, and just need to be pulled out with the pry tool.
When the bottom clip is removed, then you can pull the plastic cover, there are a clip on the top, on the inside of the cover.

Image


Then you have to remove the 9 plastic clips located all around the fabric cover inside the trunk lid, you will see that there is a small gap in the plastic clips, take the small screwdriver, and pop the clips open, then they are easy to pull out.

Image


From the inside of the lid, start with removing the bolt located on top of the plastic cover, holding the section where the Honda logo is placed.

Now you have to be aware of where the clips are located inside the cover. Take the pry tool and carefully lift the cover just beside where the clips are located, I did not break any of the clips, they comes out with a snap, just make sure you don't pull in the cover.


Image


Remove the 2 plugs, one for the rear camera, and the other for the led light. You have to remove the wire for the led light, then the cover i free.


Image


If you want to change the Honda logo, then you have to break the 2 small plastic pins located in the red circle, you can reuse the metal clips holding the logo, I used a side cutter, and reused the metal clips.


Image


Reverse the process to put the caver back on, I used a small amount of liquid grease to put in the holes for the cover clips, so when I reassembled the cover it was so easy, took me 3 min.
 
#17 · (Edited)
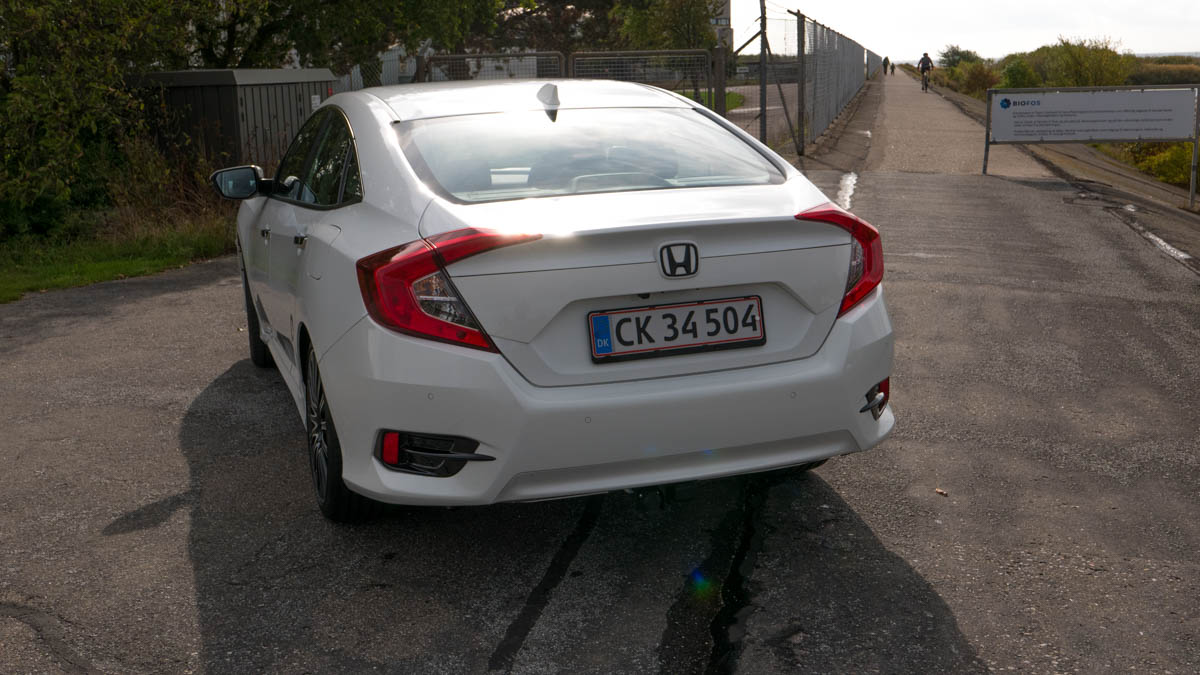
Here are some pictures of the car after I got it painted and fitted the black logo, front and rear.

The 4 door Honda Civic is sampled in Turkey, and this version is only delivered with chrome front trim and chrome Honda logo, and I must admit I'm not a fan of chrome, and funny enough the 5 door Honda is sampled in England and is only delivered wit black front trim, but still the Chrome Honda logo.

I think the 4 door looks so much more cool with black front. And as I don't like "raw" plastic trim, I got all the plastic trim painted in black, except the plastic trim located in the bottom of the rear bumper, I chose to paint it the same colour as the car, look more sleek.


Also I removed the CIVIC on the rear, looks more clean this way :)


Now I'm just waiting for my carbon cover for the side mirrors.


Image


Image


Image


Image


Image


Image
 
#19 ·
Got my "carbon" wing mirror cover, just need to fit it.


And at the same time got 1. meter of Oracal wrap (black) so I can wrap the chrome trim on top of the side windows.


Slowly coming along, but I can't find an open air filter that's TĂĽv approved, and I'm still in doubt if I should go for a BlueSpark or Ktuner chip tuner :)


Image
 
#20 ·
Got around to fit my gear gaiter fixating, so it fits my Skunk2 gear knob.

Found it on Ebay, and I'm much more pleased with it, than I first thought, It complete the Skunk2, as my hand fits the gear knob, and my pinkie finger rests on the gear gaiter fixating :)
And it looks so much nicer than before.

And I have made a How To I have linked to here https://www.civinfo.com/forum/how-guides-only-10g/422698-how-change-gearkonb-skunk2.html

Image


Image
 
#25 ·
I was looking for some rubber winter mats for my car, and I was almost about to get some OEM, but then I found a better solution.


Image


I always found when I clean my car, that the place where the most dirt was gathered, was just below the foot rest.


Image


So I found a set, where there is a rubber flap that covers the foot rest :) and the set was almost half price of the OEM, and it fits just great. There's the holes for the fixating clips, and the quality of the rubber is great, so I'm pleased.


Image


And on the same time I found my SF49 winter hat for my Skunk2 gear knob.


Link for the mats is perhaps not so interesting for some of your guys, but here it is anyway.


https://www.ebay.co.uk/itm/Gummimat...VIC-ab-2017/273616004695?ssPageName=STRK:MEBIDX:IT&_trksid=p2057872.m2749.l2649


Image
 
#29 ·